


 Deutsch
 English
 Italiano








Finishing for 3D-printed parts: surface, color and function
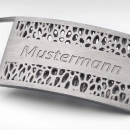
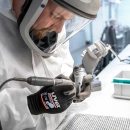
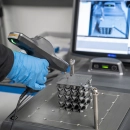
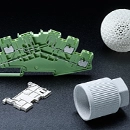
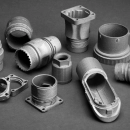
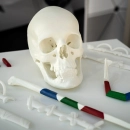
Finishing – also called post-processing – covers all work steps after 3D printing that improve the surface, appearance or function of a part. These include blasting, sanding and polishing, vapor smoothing, dyeing and painting, infiltration, adding threads and assembling several parts.
Which options are possible depends on the process, the material and the supplier. On the PROTIQ Marketplace, the configurator shows the available finishing options as soon as you have selected your material. For special requests, we are happy to advise you personally.
Finishing at a glance
- Surface
- Blasting, vibratory finishing, sanding, polishing, vapor smoothing
- Color
- Dyeing, painting
- Function
- Infiltration, threads, threaded inserts
- Metal
- Heat treatment, machining
- Large parts
- Split, print and join
- Selection
- in the configurator after choosing the material
- Special requests
- on request
The available options depend on the process, material and supplier.
Overview
Which finishing options are there in 3D printing?
Finishing options fall roughly into four groups: they smooth the surface, give the part a color, improve its function – for example through infiltration or threads – or join several parts together. For metal parts, heat treatment and machining are added.
Blasting, sanding, polishing
For even, smooth or glossy surfaces – from bead-blasted matte to a mirror polish.
Learn moreVapor smoothing
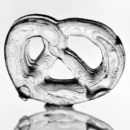
Solvent vapor smooths and seals the surface of plastic parts made by SLS and MJF.
Learn moreDyeing and painting
For parts in the color you want – dyed or painted with an opaque finish.
Learn moreInfiltration
Epoxy resin seals the pores of laser-sintered parts and makes them more resistant.
Learn moreThreads and inserts
Tapped threads or heat-set threaded inserts for durable screw connections.
Learn moreMetal post-processing
Heat treatment, sandblasting, machining of functional surfaces and polishing.
Learn moreSplitting and assembly
Large parts are split, printed separately and joined; assemblies are put together to your specifications.
Learn moreSelect in the configurator
The matching options appear once you have chosen your material. We discuss special requests with you.
Learn moreBy process
Which finishing suits which 3D printing process?
How a part is post-processed depends mainly on the process: parts from the powder bed are slightly rough, resin parts usually need support structures, and metal parts are often heat-treated and machined on functional surfaces.
| Process | Part of the process | Typical finishing options |
|---|---|---|
| Laser sintering (SLS) | Depowdering, blasting | Dyeing, painting, vibratory finishing, vapor smoothing, infiltration, threaded inserts, splitting and joining |
| Multi Jet Fusion (MJF) | Depowdering, blasting | Dyeing; depending on the supplier, vapor smoothing, sealing or painting |
| Stereolithography (SLA) | Cleaning, removing supports, reworking contact points | Sanding, polishing, painting, clear coat for transparent parts |
| PolyJet / MultiJet Modeling (MJM) | Removing support material | Surface already very smooth; further steps usually not needed |
| CLIP process | Cleaning, removing supports, post-curing | Depending on the offer, e.g. painting |
| Hot Lithography | Cleaning, removing supports, post-curing depending on the material | Depending on the supplier |
| Binder Jetting | Depowdering | Reworking holes and mating surfaces; further steps depending on the offer |
| Fused Deposition Modeling (FDM) | Removing supports | Depending on the material, e.g. sanding, drilling, painting or tapping threads |
| Laser melting (SLM) | Separating, removing supports, sandblasting | Heat treatment, machining, polishing |
| Lithography-based Metal Manufacturing (LMM) | Debinding, sintering | Micro-blasting, heat treatment |
| Ceramics (LCM) | Debinding, sintering | Grinding or polishing of functional surfaces |
| Glass (LGM) | Debinding, sintering | Coating for a smoother, more transparent surface |
This overview is not exhaustive. The configurator shows which options are offered for your material; further post-processing on request.
↑ Back to overviewSurface
How can 3D-printed surfaces be smoothed?
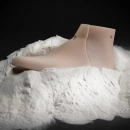
Parts made with powder bed processes such as laser sintering, Multi Jet Fusion and laser melting have a slightly rough, matte surface. With resin processes such as stereolithography, fine steps between the individual layers can be visible. Blasting, vibratory finishing, sanding and polishing make the surface more even and smoother.
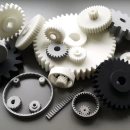
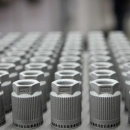
- Blasting: A blasting medium is propelled onto the part with compressed air, removing adhering powder and creating an even, matte appearance. For powder bed parts, blasting is usually standard.
- Vibratory finishing: The parts run together with abrasive media in a vibrating container. Edges are rounded and the surface becomes smoother.
- Sanding and polishing: By hand or by machine up to a satin or glossy surface – for SLA parts all the way to clear, transparent parts, and for metal parts up to a mirror finish.
Parts made with the PolyJet or MultiJet process are already very smooth after printing. As a rule, only the support material is removed.


What are the benefits of vapor smoothing?
In vapor smoothing, also known as chemical smoothing, solvent vapor briefly dissolves the top layer of a plastic part. The surface becomes smooth and closed, absorbs less dirt and liquid and is easier to clean – even on complex geometries.
It is particularly suitable for parts made by laser sintering (SLS) and Multi Jet Fusion (MJF), for example from PA11, PA12 or TPU. It is not an option for resin, metal or ceramic parts.
The color is retained, but smoothed parts often look slightly darker and glossier. Because an additional work step is needed, the production time is somewhat longer.
↑ Back to overviewColor
How do 3D-printed parts get their color?
Many materials in industrial 3D printing are only available in a few base colors such as white, gray, black or transparent. Dyeing or painting gives parts the color you want – for prototypes and display models, for example, or to highlight functions in color.
Dyeing
In dyeing, the surface of the part absorbs the dye. This is particularly suitable for plastic parts made by SLS and MJF. The achievable shade depends on the base color: white parts can also be dyed in light colors, gray parts only in muted shades. Black works well with both and makes yellowing of light-colored parts less visible.
Painting
Paint covers evenly and is available in many RAL colors. A clear coat gives SLA parts the clearest possible appearance, and a UV-resistant paint protects surfaces that are exposed to a lot of light. Because paint adds a layer, please discuss fits and functional surfaces with us in advance.
↑ Back to overview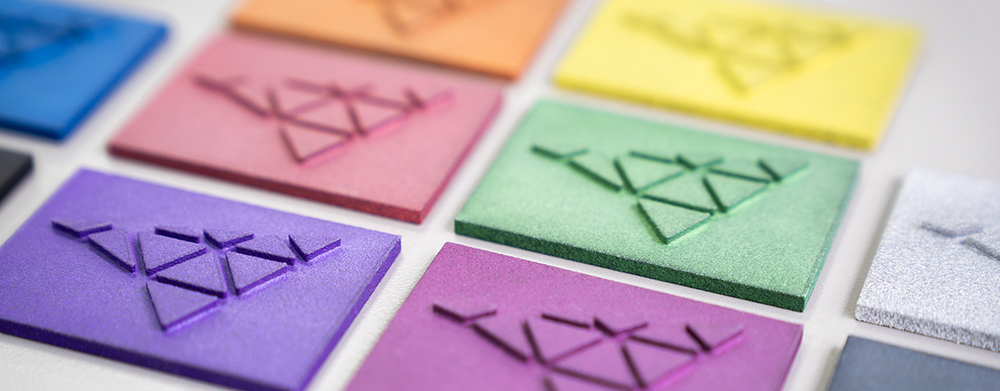
Threads
How are threads added to 3D-printed parts?
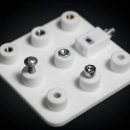
Threads can be added to plastic and metal parts after printing. In metal, a core hole is usually drilled and the thread is tapped. In plastic, threads can also be tapped, or brass threaded inserts can be heat-set.
Heat-set threaded inserts are pressed into a prepared hole with a heated tool. They hold up well even to frequent screwing. Printing small threads directly is usually not worthwhile – it is better to tap them afterwards or replace them with inserts. Ideally, include core holes and holes for inserts in the 3D model.
↑ Back to overview
Metal
How are 3D-printed metal parts post-processed?
In laser melting (SLM), the part is separated from the build plate after printing and the support structures are removed. Depending on the material and requirements, this is followed by heat treatment, sandblasting, machining of functional surfaces or polishing.
- Heat treatment: Some steels only reach their highest strength after heat treatment – the tool steel MS1, for example, 2,030 MPa instead of 1,100 MPa tensile strength.
- Sandblasting: Produces an even, matte surface with a roughness of around Ra 2.5 to 10 µm, depending on the material.
- Machining: Fits, sealing surfaces and threads are usually milled, turned or drilled. Plan a machining allowance for this.
- Polishing: For smooth visible and functional surfaces, up to a mirror finish.
Small metal parts made with the LMM process are micro-blasted after sintering if required. For 17-4PH, this reduces the roughness from Ra 5 ± 1 µm to Ra 3 ± 2 µm.
↑ Back to overviewAssembly
Can large parts be split and assembled?
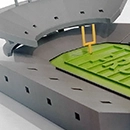
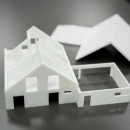
Yes. If a part is larger than the build volume, PROTIQ can split it into several parts, print them separately and then join them into one complete part. This is common with large architectural models, for example.
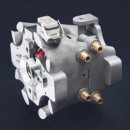
When you upload your file, the system automatically checks whether your part fits into the build volume. On request, we also assemble assemblies from several individual parts to your specifications, for example with insert parts or threaded inserts. Please talk to us before ordering.
↑ Back to overview
Ordering
How do I select finishing on the PROTIQ Marketplace?
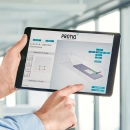
You select finishing options directly in the configurator. Which options are offered depends on the material and the supplier – they appear as soon as you have chosen your material.
- Upload your fileUpload your 3D model in the configurator.
- Choose a materialOnce you have chosen the material, the configurator shows the available finishing options.
- Select finishingChoose the option you want and see the prices and production times of the suppliers who can make your part.
- OrderOrder online directly at the price you selected.
Your preferred finishing is not listed? Contact us – we are happy to check special requests.
↑ Back to overviewTips
What should you keep in mind with finishing?
Finishing changes the surface and sometimes the dimensions of a part. If you think about functional surfaces, color and time early on, you get the result you want without rework.
- Mark functional surfacesLet us know which surfaces must stay dimensionally accurate or should not be painted.
- Plan a machining allowanceFits and sealing surfaces that are machined need extra material.
- Consider layer thicknessPaints and coatings add material – this can matter for tight fits.
- Mind the base colorWhen dyeing, the achievable shade depends on the base color of the material.
- Include holesCore holes for threads and holes for threaded inserts can be included directly in the 3D model.
- Allow timeEvery finishing step is an additional operation and can extend the production time.
FAQ
Frequently asked questions about finishing
What does finishing mean in 3D printing?
Finishing, also called post-processing, covers all work steps after 3D printing that improve the surface, appearance or function of a part – for example blasting, polishing, vapor smoothing, dyeing, painting, infiltration, threads or assembly.
Which finishing options are available on the PROTIQ Marketplace?
That depends on the process, material and supplier. On the PROTIQ Marketplace, the configurator shows the available options as soon as you have selected your material. Further post-processing is possible on request.
How can SLS parts be made smoother?
Laser-sintered parts are blasted after depowdering and then have an even, matte finish. Vibratory finishing or vapor smoothing makes them smoother. Vapor smoothing also seals the surface.
What is the difference between dyeing and painting?
In dyeing, the surface absorbs the dye, and the shade depends on the base color. Paint forms its own opaque layer and is available in many RAL colors, but it adds a little thickness.
Can 3D-printed parts be painted?
Yes. Plastic parts, for example from SLS or SLA, can be painted. A clear coat gives transparent SLA parts the clearest possible appearance, and a UV-resistant paint protects surfaces exposed to light.
Does finishing make 3D-printed parts tight?
Infiltration and vapor smoothing seal the surface of plastic parts. If a part needs to be gas-tight or liquid-tight, please check its suitability with us in advance.
Does finishing extend the delivery time?
Every finishing step is an additional operation and can extend the production time. You can see the production time in the offer.
Can PROTIQ make parts that are larger than the build volume?
Yes. PROTIQ can split large parts into several pieces, print them separately and then join them – for example for large architectural models.
How much does finishing cost?
The price depends on the process, part size, quantity and chosen option, among other things. For finishing requests that are not listed in the configurator, you will receive a quote on request.